Brief Description: Left wing skeleton prep part #1
Spent the day with my three ladies at the beach...man was it hot!!! After supper, I snuck into the garage and started to debur the left wing ribs. I deburred all of the final drilled holes and I did a second go over on a few ribs that needed some extra attention.
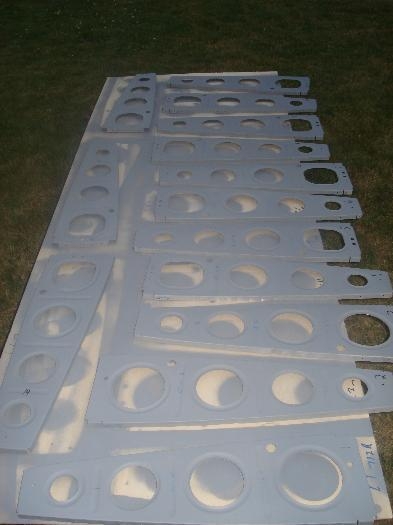
I then scotchbrited, cleaned, and rinsed the ribs and set them to dry. After a good drying, I grabbed a 1/4 piece of new plywood out of the shed and laid it out. The picture looks like it's lying on the ground, but it's actually off the ground about 3 feet. I laid out the ribs and marked their number on the plywood in the event my markings on the ribs weren't visible through the primer.
I primed the ribs, renumbered them, and let the hot sun dry them.
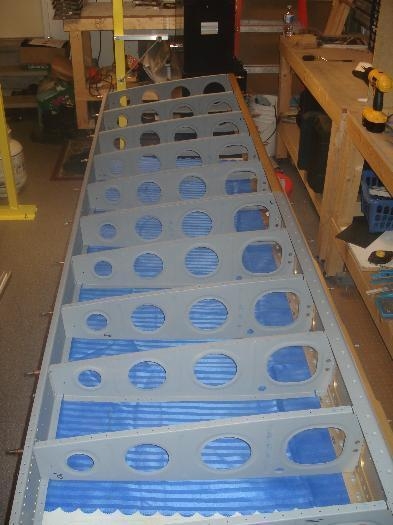
Back in the garage, I deburred the left and right wing main and rear spars holes that I final drilled with a #30. I reclecoed the ribs to the spars and am now ready to rivet the left wing skeleton.
I'll make sure to carefully double check the rivet call outs and ensure the holes that are not to be riveted are marked accordingly.